28th Sep2016

Prevent duplicate Drafts, Junk, Sent, Trash folders in Dovecot

by Gyro

I've set up a new mail server for a client, and then used imapsync to copy all existing mail from the old server to the new server.

Everything seemed to have run smoothly, but shortly after they started using email via the new server, they had multiple folders for drafts, junk, sent, and trash.

After investigating this a bit, I found out that different mail clients expect different folder names on the server, and dovecot will create them when missing.

This really confused me, as this was not happening on the old server, so why was this now happening on the new server?!

Well, I could have prevented this from happening, if I would have had a look at the old server's configuration.

Turns out, you have to configure "Namespaces" to properly configure folders and possible duplicates.

Below is the configuration that was (and now is) in place. It has to be added to /etc/dovecot/dovecot.conf


namespace inbox {
  type = private
  separator = .
  prefix = INBOX.
  inbox = yes

  mailbox Drafts {
    special_use = \Drafts
    auto = subscribe
  }

  mailbox Junk {
    special_use = \Junk
    auto = create
  }

  mailbox spam {
    special_use = \Junk
    auto = no
  }

  mailbox Spam {
    special_use = \Junk
    auto = no
  }

  mailbox Trash {
    special_use = \Trash
    auto = subscribe
  }

  mailbox Sent {
    special_use = \Sent
    auto = subscribe
  }

  mailbox "Sent Mail" {
    special_use = \Sent
    auto = no
  }

  mailbox "Sent Messages" {
    special_use = \Sent
    auto = no
  }

  mailbox Archive {
    special_use = \Archive
    auto = create
  }

  mailbox "Archives" {
    special_use = \Archive
    auto = no
  }
}

With this configuration you get this setup:

INBOX
INBOX.Drafts
INBOX.Junk
INBOX.Trash
INBOX.Sent

Meaning, the Drafts, Junk, Trash, and Sent folders will reside inside the Inbox. Mail clients wanting to be different will have their special folder names mapped to the "one and only" folder of that type, such as iPhone's "Sent Messages" being the actual "Sent" folder.

I hope this helps anyone facing the same issue. Please leave a comment, if you found another special folder name that should be added to this list.

Enjoy! :)

3979

04th Nov2014

ISPConfig/Dovecot Fix: message exceeds temporary size limit

by Gyro

A simple ISPConfig/Dovecot Fix: message exceeds temporary size limit.

I just setup a dedicated server as a webserver using ISPConfig as the control panel following pretty much this guide:
The Perfect Server -- Ubuntu 12.04 LTS (nginx, BIND, Dovecot, ISPConfig 3)

Everything went smoothly, until I setup and tested email addresses.

Thunderbird kept giving me this error popup when trying to send an email:

The size of the message you are trying to send exceeds a temporary size limit of the server. The message was not sent; try to reduce the message size or wait some time and try again. The server responded: (IP, Sender) first encounter..

So, I searched Google for that exact phrase as well as part of it, like "The size of the message you are trying to send exceeds a temporary size limit of the server" or "message exceeds a temporary size limit", and so on, then I finally found a small post that (accidentally?) contained the solution, a parameter that was missing in my config file!

It took quite a while to find the answer, so hopefully this post will help others to get the solution quicker :)

FIX: message exceeds temporary size limit

edit /etc/postfix/main.cf and add this (missing) line:

virtual_mailbox_limit = 0

Final step: restart dovecot:
$ service dovecot restart

Done, enjoy! :crazy:

Sources:
http://www.howtoforge.com/forums/showthread.php?t=1325
http://www.postfix.org/postconf.5.html

1354

02nd Aug2014

FIX: Skype 4.3 for Linux crashes after start

by Gyro

Yesterday,

Microshit forced all Linux Skype users to update to version 4.3 and made is "impossible" to keep your chat history.

Reason being, they changed something in the main.db so it is now incompatible with Skype Version 4.3 on Linux (Ubuntu).

However, there is a simple fix when Skype 4.3 for Linux crashes after start, as the issue has to do with files that were sent and received.

$ sqlite3 ~/.Skype/[YOURUSER}/main.db
sqlite> DELETE FROM Messages WHERE type=68;
sqlite> .quit

Once you are logged into skype, it will re-add your recently sent and received files, so most of them will be back in the history.

Enjoy! :crazy:

Source: http://community.skype.com/t5/Linux/Skype-4-3-crash-on-ubuntu-14-04/td-p/3219892/page/2

3339

23rd Jul2014

Ubuntu: Autostart Dropbox during Boot / System Startup

by Gyro

Today, I wanted to autostart dropbox during boot, so it is loaded during system startup and not only after I login.

To accomplish this, I needed to create a file and execute a few terminal commands.

1. Get startup script

Go to: dropboxwiki.com and click on the "Debian/Ubuntu" bar, copy the code.

2. Create a new file, paste the code into new file, and adjust it a bit

$ sudo nano /etc/init.d/dropbox

You need to provide the username(s) that use dropbox.
Edit the follwing line in the code, replace user1 user2 with the correct username(s):

DROPBOX_USERS="user1 user2"

Save the file, close editor, and make the file executable.
$ sudo chmod +x /etc/init.d/dropbox

3. Add the file to the autostart with lower priority

$ sudo update-rc.d -f dropbox remove
$ sudo update-rc.d dropbox defaults 98 02
This will load dropbox near the end of the system startup, found it in the ubuntuforums.

That should be all, enjoy :crazy:

3713

26th Jun2014

VirtualBox – moving a VDI file and re-linking it to the Guest

by Gyro

virtualbox

Today I decided to move my vdi files to another partition.
So, I moved them and then started the Oracle VM VirtuaBox Manager to re-link the vdi files to the respective guest.First, I opened the settings of each Virtual Machine and deleted the "old" hard disk under "Storage".Then I clicked on "Add Attachment", selected "Add Hard Disk" and "Choose existing disk", and then selected the vdi file.

Next came a very strange error:

The Problem

Cannot register the hard disk ‘FULL PATH TO NEW LOCATION OF VDI' with UUID {UUID OF THE VDI} because a hard disk ‘FULL PATH TO OLD LOCATION OF VDI' with UUID {UUID OF THE VDI} already exists in the media registry (‘/home/user/.VirtualBox/VirtualBox.xml').

This confused me pretty good, as I knew for a fact that I moved the vdi, so it did not exist at the old location anymore. I also had no clue what this media registry was supposed to be, and before opening that xml file and messing around with it, I decided to see if others had this issue before.

After a bit of google-ing, I found the solution in the VirtualBox forum:

Even though the thread was started on 2. Mar 2009, 16:43, some kind soul decided to register to the forum to make one single post to the forum in this thread on 21. Dec 2012, 22:00 (Christmas spirit?) with the simple solution to this problem.

Hi there,

I had the same UUID problem and a very easy fix worked for me. I went File>virtual media manager. I found the vdi file that was giving me issues. Selected it and removed (though it was showing up as inaccessible). Then started the VM again and selected the file from my local hard-disk. That was it!
Hope this works for you too. :)
Om

So, to summarize with a bit more clarity:

The Solution

1. Open the Oracle VM VirtuaBox Manager
     Click on File -> Virtual Media Manager (or Ctrl+D)
2. Delete the hard disk entry in question (select and press "Del" on keyboard)
3. Open "Settings" of the Virtual Machine, go to "Storage", click "Add Attachment", select "Add Hard Disk" and "Choose existing disk", then selected the vdi file and you are done.

Enjoy :)

273514

23rd Jan2014

Update/Install ImageMagick on CentOS 5 and CentOS 6

by Gyro

Today I had a classic example of what happens when you do not RTFM. I had to install ImageMagick on a webserver running CentOS 5 with cPanel. First I simply ran "yum install imagemagick", which did install ImageMagick just fine.

Now, the reason I had to install it was to do a batch resize of about 20,000 images and place the resized images in a new directory. So I did:
# mogrify -resize 250 -quality 70 -path /home/somesite/public_html/image/thumbs/ -format jpg /home/somesite/public_html/images/*

To my surprise I got the error message:

mogrify: unrecognized option `-path'.

After a quick google search, I realized that yum installed a super old version that was not supporting the -path option?!

So, after some more searching, I found this great guide on how to Install ImageMagick 6.6.5 and followed the instructions. But when I got to the final installation command, I got a dependencies error?!

After another google search, I came across a forum post saying "Make sure that RPMForge repository is installed first, and then everything works."… and when I looked back at the guide, I realized that it did in fact tell me to do that. The reason I did not see it was because it was a one liner with a link to another website, and I was expecting to be able to simply copy paste commands, so I skipped reading that line. I did not RTFM properly…

So, to make it easy for the future, I will combine these two pages, in order to have a step by step set of instructions without having to go to another website :)

Before starting, make you sure you know whether you are using a 32-bit or 64-bit system.
# uname -i
x86_64 would be 64-bit

OK, here we go!

1. Uninstall ImageMagick

# rpm -e --nodeps ImageMagick.i386 ImageMagick-devel.i386 ImageMagick.x86_64 ImageMagick-devel.x86_64
this actually didn't work for me, so I did:
# yum remove imagemagick

2. Add the EPEL repository to yum:

CentOS 6:
# rpm -Uvh http://dl.fedoraproject.org/pub/epel/6/i386/epel-release-6-8.noarch.rpm
CentOS 5:
# rpm -Uvh http://dl.fedoraproject.org/pub/epel/5/i386/epel-release-5-4.noarch.rpm

3. Download and Install RPMforge (Check here for newer version.)

CentOS 6:
Download RPMforge for 32-bit systems: rpmforge-release-0.5.3-1.el6.rf.i686.rpm
# wget http://pkgs.repoforge.org/rpmforge-release/rpmforge-release-0.5.3-1.el6.rf.i686.rpm
Download RPMforge for 64-bit systems: rpmforge-release-0.5.3-1.el6.rf.x86_64.rpm
# wget http://pkgs.repoforge.org/rpmforge-release/rpmforge-release-0.5.3-1.el6.rf.x86_64.rpm

Install DAG's GPG key:
# rpm --import http://apt.sw.be/RPM-GPG-KEY.dag.txt

If you get an error message like the following the key has already been imported:
error: http://apt.sw.be/RPM-GPG-KEY.dag.txt: key 1 import failed.

Verify the package you have downloaded:
# rpm -K rpmforge-release-0.5.3-1.el6.rf.*.rpm

Install RPMforge:
# rpm -i rpmforge-release-0.5.3-1.el6.rf.*.rpm

CentOS 5:
Download RPMforge for 32-bit systems: rpmforge-release-0.5.3-1.el5.rf.i386.rpm
# wget http://pkgs.repoforge.org/rpmforge-release/rpmforge-release-0.5.3-1.el5.rf.i386.rpm
Download RPMforge for 64-bit systems: rpmforge-release-0.5.3-1.el5.rf.x86_64.rpm
# wget http://pkgs.repoforge.org/rpmforge-release/rpmforge-release-0.5.3-1.el5.rf.x86_64.rpm

Install DAG's GPG key:
# rpm --import http://apt.sw.be/RPM-GPG-KEY.dag.txt

If you get an error message like the following the key has already been imported:
error: http://apt.sw.be/RPM-GPG-KEY.dag.txt: key 1 import failed.

Verify the package you have downloaded
# rpm -K rpmforge-release-0.5.3-1.el5.rf.*.rpm

Install RPMforge
# rpm -i rpmforge-release-0.5.3-1.el5.rf.*.rpm

4. Install dependencies for ImageMagick 6.6

For 32-bit systems:
# yum install djvulibre OpenEXR jasper ghostscript librsvg2 libwmf libtool-ltdl
For 64-bit systems:
# yum install djvulibre OpenEXR jasper ghostscript librsvg2.x86_64 libwmf.x86_64 libtool-ltdl.x86_64

Systems running CentOS 6 will need the old version of libtool-ltdl installed:
For 32-bit systems:
# rpm -ivh --force ftp://ftp.muug.mb.ca/mirror/centos/5.9/os/i386/CentOS/libtool-ltdl-1.5.22-7.el5_4.i386.rpm
For 64-bit systems:
# rpm -ivh --force ftp://ftp.muug.mb.ca/mirror/centos/5.9/os/x86_64/CentOS/libtool-ltdl-1.5.22-7.el5_4.x86_64.rpm

5. Download and Install ImageMagick 6.6.5

Download for 32-bit systems: ImageMagick-6.6.5-10.i386.rpm
# wget http://www.lassosoft.com/_downloads/public/Lasso_Server/CentOS-Extra/ImageMagick-6.6.5-10.i386.rpm
Download for 64-bit systems: ImageMagick-6.6.5-10.x86_64.rpm
# wget http://www.lassosoft.com/_downloads/public/Lasso_Server/CentOS-Extra/ImageMagick-6.6.5-10.x86_64.rpm

Install ImageMagick
# rpm -ivh ImageMagick-6.6.5*

DONE! :crazy:

9718

18th Oct2013

How to install MS Office 2007 in Ubuntu 12.04 using wine

by Gyro

This is a quick and easy guide on how to install MS Office 2007 in Ubuntu 12.04 using wine. This includes winetricks settings to run Office 2007 using wine.

Most of what you can read here comes from an excellent post I found explaining how to do this on Ubuntu. I have slightly modified those steps, in order to make the installation on Ubuntu 12.04 as easy and as fast as possible.

1. Install wine1.4, winetricks, wine-gecko1.4.
If winbind is not installed install it also.
~$ sudo apt-get install wine1.4 winetricks wine-gecko1.4

2. Install Microsoft Core fonts
~$ sudo apt-get install msttcorefonts
OR
~$ sudo apt-get install ttf-mscorefonts-installer

If you have any problem with the installation then download the offline installer and do the setup as follows:
~$ wget http://imaginux.com/repos/pool/renzo/msttcorefonts-offline_1.0-0ubuntu1_all.deb
~$ sudo dpkg -i msttcorefonts-offline_1.0-0ubuntu1_all.deb

3. 32 bit users can directly go to step 4.
64 bit users only must run the following commands in a terminal. This will set the Windows version as 32 bit, as Microsoft Office is available for 32 bit only.

Warning: rm -rf ~/.wine will remove all programs and configurations you have setup under wine. If you have something important in that directory please backup BEFORE running the following commands.

~$ rm -rf ~/.wine
~$ export WINEARCH=win32
~$ wineboot --update

4. Make sure you got the files you need for step 5.
Check if the folder "~/.cache/winetricks/msxml3" exists, containing the file "msxml3.msi". You may have to create the folder, download the file, and place the file into it.
You can download "msxml3.msi" from:
http://download.cnet.com/Microsoft-XML-Parser-MSXML-3-0-Service-Pack-7-SP7/3000-7241_4-10731613.html

5. Run winetricks and go through the individual installation windows
~$ winetricks
Select "Install a Windows DLL or Component".

In the next window tick the following packages
a) dotnet20
b) msxml3
c) gdiplus
d) riched20
e) riched30
f) vcrun2005

Press Ok.

This step could also be run via command line:
~$ winetricks dotnet20 msxml3 gdiplus riched20 riched30 vcrun2005

If the dotnet20 Installation fails

It may return the error: dotnet20 requires Microsoft Installer 3.0.

In that case download Microsoft Installer 3 and install it:
~$ wine [ path to installer ]

You can download Microsoft Installer 3 here:
http://www.microsoft.com/en-us/download/confirmation.aspx?id=16821

After you installed Microsoft Installer 3, reset your wine again.

Warning: rm -rf ~/.wine will remove all programs and configurations you have setup under wine. If you have something important in that directory please backup BEFORE running the following commands.

~$ rm -rf ~/.wine
~$ export WINEARCH=win32
~$ wineboot --update
~$ winecfg

now restart Step 5.

6. Install Office 2007
Navigate to the folder where the Setup.exe is locates and run it with wine.
~$ wine ./Setup.exe

You will find all installed office apps in your dash home.

On First Run, select "I dont want to use Microsoft Update".

Extra: Download and Install SP2 or SP3

Since Service Pack 2 you have the option to Save As… PDF, so it may be good idea to install at least that one.

Service Pack 2
~$ wget http://download.microsoft.com/download/A/1/4/A14E308D-529C-48F9-9DAF-7C3BDC88FA57/office2007sp2-kb953195-fullfile-en-us.exe
~$ wine ./office2007sp2-kb953195-fullfile-en-us.exe

Service Pack 3
~$ wget http://download.microsoft.com/download/2/2/A/22AA9422-C45D-46FA-808F-179A1BEBB2A7/office2007sp3-kb2526086-fullfile-en-us.exe
~$ wine ./office2007sp3-kb2526086-fullfile-en-us.exe

Sources:
NITHIN C

6128

11th Sep2013

Ubuntu Flash Player Plugin Update

by Gyro

Today YouTube and Facebook kept telling me that my flash player plugin is out of date and that I need to update.

However, when following the link in the warning, all I got offered was of some .rpm file I could download.

As I rarely need to use an .rpm file in Ubuntu, I figured I missed something. So I searched a bit more, and more, and more… and bingo, there is actually a package I can install via apt-get!

This is not really a ubuntu flash player plugin update, but rather an installation of the flash player plugin. It's a bit weird as this stuff used to come with the browser (Chromium) and I never had to update the flash player itself, nor install it. Seems that something has changed, and there is a package on launchpad called “adobe-flashplugin” package in Ubuntu: https://launchpad.net/ubuntu/+source/adobe-flashplugin

Since it is there, you don't need to download anything, just open your terminal and type:
# sudo apt-get install adobe-flashplugin
And you are done!

You will have the latest flash player installed, and it works perfectly fine (for me) with Firefox and Chrome. I am guessing it will update just like any other package… time will tell.

Enjoy! ;)

1438

31st Jul2013

This video is currently unavailable – YouTube bug using Chrome

by Gyro

The last couple of weeks I noticed that more and more YouTube videos would not play in Chrome with a message saying "This video is currently unavailable".

There is a link to a help page, but none of the tips solved the issue for me. I checked the flash player version, cleared the browser cache, all with no change.

Testing in Firefox, all videos played perfectly fine. In fact, I have started using Firefox for YouTube, because I was too lazy to find out how to fix this problem in Chrome, after the help page didn't help…

Today, I found the solutions… more or less by accident, and the solution is VERY weird.

As of recently, this may not work. If it doesn't, please read the UPDATE at the bottom of this post…

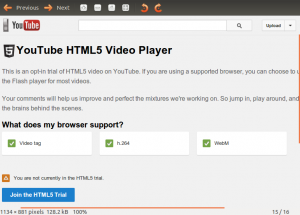
  1. Go to: http://www.youtube.com/html5
  2. If you haven't already joined the HTML5 trial, you have to join it now! Also, try loading the video again… it probably won't, but to follow my steps 100%, you have to do it ;)
    join
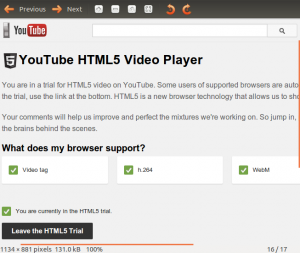
  3. If you have already joined the HTML5 trial, simply Leave the HTML5 Trial.
    leave

Once you have (joined and) left the HTML5 trial all videos that used to say "This video is currently unavailable" should play fine.

Very strange bug… I stumbled upon the solution because someone recommended to leave the HTML5 trial. That was the only thing I haven't tried, as I didn't even know a HTML5 trial existed. So, after going through loads of tips and messing around with my chrome plugins and whatnot, I thought this may lead me to something. Of course, I had not joined the trial, so I joined the trial and checked one of the videos, it still showed me this annoying ""This video is currently unavailable"" message. So, I left the HTML 5 trial again, and tada -- now the videos play -- no more "This video is currently unavailable", however weird it is that this worked, I am happy it did ;)

Enjoy!

UPDATE:

This work around seems to have stopped working as of recently, some reported that using the HTML5 player now works, but it doesn't for me.

I found a new way to get these videos to play, which is also a weird work around. Simply change the URL to an embed link in the address bar.
 
For example:

http://www.youtube.com/watch?v=O_DQKQ-7J7E

change to:

http://www.youtube.com/embed/O_DQKQ-7J7E

And… it get’s even stranger at this point!
I have to click Play, wait for the spinning wheel to disappear, and then click on the video again (as if I want to pause it) to make it play.
 
And as a side note…at this time I recommend just using Firefox for YouTube. While changing the URL to an embed URL works for me, it destroys the user experience of YouTube.
 
It’s a bit sad, to say the least, that two Google products wont work together, especially since this problem is ongoing for so many months. All I can say is "Shame on you Google", and "Thanks Google, for making my post a top search result for your bug" :crazy:

233727

23rd Mar2013

VirtualBox USB Add Filter From Device No Device Available Ubuntu

by Gyro

I am running an old XP license on a Virtualbox guest. One things that has always bugged me was the inability to use USB devices within my VirtualBox guest.

After searching google a few times for "Virtualbox USB Add Filter From Device No Device Available Ubuntu" and similar search terms, I found A LOT of different "solutions" that just wouldn't do what I wanted -- to be able to access my USB Flash Drive on my Virtual Box Windows XP guest.

So, on to the solution that worked for me (and will most likely work for you)!

1. Enable USB 2.0 (EHCI) Support

First, check your virtual box version!

I am using 4.1.12, so I had to go to:

http://download.virtualbox.org/virtualbox/4.1.12/
 If you are using a different VirtualBox version, simply replace 4.1.12 with your version in the link.

There I downloaded:

Oracle_VM_VirtualBox_Extension_Pack-4.1.12-77245.vbox-extpack
 The important part here is the "-77245" in the file name, (if this is updated, the number may change, just look for the one that has the -7xxxx)

This is a special Extension Pack that allows you to enable USB 2.0 support. To install it just double-click the downloaded file, which should open VirtualBox and start the actual installation. You need to do this regardless of whether you have installed another extension pack already or not. After that enable USB 2.0 (EHCI) in the Settings of your VirtualBox Guest.

2. Add your linux user to the virtual box group

Manually add the linux user to the vboxusers group:
# sudo usermod -a -G vboxusers USERNAME
Where USERNAME is the user you are currently logged in with.

To make the user work in the new group, I had to logout and login again.

Now, when I open the Settings for my VirtualBox Guest, I see all my USB devices in the list when clicking on the "Add Filter From Device" icon. However, I did not have to add a Filter to have the USB flash drive available as a Removable Device within Windows XP. Also, when I plug in my external Hard Drive, it gets mounted by Ubuntu and is also available in my VirtualBox Guest at the same time.

4642

21st Feb2013

Restore large mysql databases with nginx 504 Gateway Timeout

by Gyro

I had to restore a 36MB sql database today and kept getting a "504 Gateway Time-out".

After playing around with the config files, adding fastcgi_read_timeout to the settings for php5-fpm, and fiddling with the php.ini, I realized that this can be accomplished with one single line using ssh:

Assuming that you have packed the .sql file into a zip file, and you are currently in that folder:
# gunzip < databasebackup.sql.gz | mysql -DDATABASENAME -uUSERNAME -pPASSWORD

DATABASENAME = name of the database
USERNAME = mysql username
PASSWORD = mysql password

I hope this helps when trying to restore large mysql databases with nginx 504 Gateway Timeout

2337

17th Jan2013

Automatic eBay bidding with JBidWatcher

by Gyro

I found a neat little program, with which you can monitor eBay auctions and make a last minute bid, or actually even last second bid :)

It is called JBidWatcher, and is available for Windows, Linux, and MacOS.

I have installed it on Ubuntu, using the help provided in this thread over at the Ubuntu Forums.

This is an updated version of that post:

Requirements: you must have the Sun version of Java installed.

1. Download the latest version of JBidWatcher (2.5.3pre3) here, but you may  want to have a look on the official website to see if a new version has been released int he meantime… If there is a newer version available please leave a comment to let me know.

2. You can install JBidWatcher anywhere, I created a directory /usr/local/share/java and copied it there.

# sudo mkdir /usr/local/share/java
# sudo cp JBidWatcher-0.9.9.jar /usr/local/share/java

3. Make a bash script to run it.
# sudo gedit /usr/local/bin/jbidwatcher
and paste the following:

#!/bin/sh
java -jar /usr/local/share/java/JBidWatcher-0.9.9.jar

Make the script executable:
# sudo chmod +x /usr/local/bin/jbidwatcher
You are almost set. Just run from command line
# jbidwatcher
and enter your ebay user name and password.

4. You can make a .desktop file for JBidWatcher to have it in your menu:
# sudo gedit /usr/local/share/applications/jbidwatcher.desktop
and insert the following text:

[Desktop Entry]
Encoding=UTF-8
Name=JBidWatcher
Comment=Ebay watching and bidding tool
Exec=jbidwatcher
Icon=jbidwatch.xpm
Terminal=false
Type=Application
Categories=Utility
GenericName=JBidWatcher

It is up to you where to store jar file, the author suggests your home dir.

The site has a Quick Start Guide, available here

Enjoy! :enjoy:

2624

14th Jan2013

Using rsync to backup a remote folder onto your computer via SSH

by Gyro

I've been having a hard time remembering the correct way of doing this, so I figured I write it down…

Backup the "folder":
# rsync -avz -e ssh user@remotemachine:/some/folder/ /backup/some/folder/

When using a different ssh port (xxxx is the ssh port number):
# rsync -avz -e ‘ssh -p xxxx' user@remotemachine:/some/folder/ /backup/some/folder/

When there is a space in the folder name, you need to put single or double quotes around the folder name:
# rsync -avz -e ssh user@remotemachine:/some/folder/'with a lot of spaces'/ /backup/some/folder/'with a lot of spaces'/

Some cool commands you can add:

--delete
will remove files from the destination folder that are not present in the origin

--progress
shows a nice % progress on the current file

# rsync -avz -e --delete --progress ssh user@remotemachine:/some/folder/'with a lot of spaces'/ /backup/some/folder/'with a lot of spaces'/
This will download the content of the remote folder with a lot of spaces to your local machine with a folder of the same name, while deleting any file that is inside your local folder and not in the remote folder, and it will give you some details to the files being downloaded.

1885

13th Nov2012

Burn MP3s with K3B without converting to WAV first (Linux/Ubuntu)

by Gyro

Today I got fed up with having to use the Sound Converter to create WAV files from MP3s I want to burn for my car, Yes, I got a crappy car stereo that will not play MP3 CDs… drop it already.

So, turns out it is quite easy to get K3B to convert the MP3 files on the fly, all you got to do is install the plugin for it:
# sudo apt-get install libk3b6-extracodecs

That's it, now you can burn Music CDs with K3B by adding MP3 files to the list directly.

Enjoy! (and share) ;)

2185

08th Nov2012

Problems uploading files to ownCloud

by Gyro

I've installed ownCloud a while back and finally got around to test it today.

As ownCloud has a "Music" section, I figured I start by uploading some of my music. I first tried uploading an MP3 file via the web interface, but the spinning wheel would never go away, and an eventual refresh showed no new file. I then tried it with a few small files, and realized that anything over 1MB file size will result in the file not being uploaded, and the original gets deleted by the owncloud sync tool when it was used to upload/sync the file.

(more…)

5332

31st Jul2012

Scan IP Network show Computers Network Devices with Angry IP Scanner

by Gyro

Angry IP Scanner (aka "ipscan") is a network scanner designed to be fast and simple to use. Angry IP Scanner is a open-source and cross-platform software to Scan IP Network show Computers Network Devices in a certain IP range.

Angry IP Scanner not only finds computers and other devices connected to the network. For computers/devices found in the network, it will also display the host name, as well as scan and list their open ports. Angry IP Scanner has many other features to in regards to Scan IP Network show Computers Network Devices.

(more…)

3058

26th Jul2012

Resize VirtualBox Disk Image – grow, expand, increase a .VDI disk image in 1 minute

by Gyro
Resize VirtualBox Disk Image -- the easy and the hard way.Today I actually used up the 20GB of virtual disk space I set for the Windows XP I use for specific Windows Software. Who would have thought that an old Windows XP license would be useful again, eh? :)

After performing a quick search on how to manipulate an existing VDI file, I found a bunch of lengthy guides, all pretty much saying the exact same thing… create a new VDI, load the old and new VDI disk images into a Virtual Machine as a master and slave drive, boot with a gParted or equivalent BootCD image, and then clone the old disk to the new one… or in short: do a lot of steps that take forever, but not what I want: Resize VirtualBox Disk Image.

virtualbox

After flipping through the 10th or so guide, I realized that pretty much all of them were written in 2008… very unusual as bloggers usually write about the same subject on a yearly basis. That in mind, I search a bit more and… BINGO! Since VirtualBox 4 is out, there is a simple command line tool to resize VDI images. Man, those extra 5 minutes of searching just saved me from a lot of hassle and a huge waste of time.
(more…)

383089

23rd Jul2012

Install JDownloader for Ubuntu – DLC Download Container App

by Gyro

Install JDownloader, the DLC Download Container App for Ubuntu.

JDownloader is an open source software, written completely in Java and platform independent. Download files from One-Click-Hosters like Rapidshare.com, Share-Online, BitShare, FreakShare, or CloudNator.com — it works for users who don't pay, and users with a premium account can enter their account details to download with Full Speed. JDownloader can open DLC files and download multiple files at the same time, it has captcha recognition, and even extracts archives automatical once all files have been downloaded. JDownloader is absolutely free to use, as you would expect from Open Source software.

(more…)

4221

Pages:12»